

This amazing Dutch craftsmanship cannot be easier. With a few ingredients and a little practical time, you can get a loaf of fresh bread from homemade bread on the table. You may never return to the bread that has been bought again.
-
Put the flour in a large bowl. Place the yeast on one side, and salt on the other hand. Do not want them to touch before adding fluids.
-
In a separate bowl, beat the water and honey together. Add to the flour and stir until it is collected. The dough will look a little bit.
-
Cover the bowl with a wet towel and leave it for two hours.
-
After the dough had an opportunity to rise, put a sheet of slavery on the meter and dust lightly with flour. If you want to make a microcosm of the bread, hatch the dough in half. The other half can be stored in the refrigerator in a covered container for up to three days.
-
Gently empty the dough from the bowl directly on the flour slavery. Without dealing with the dough too much, gently form the dough in a round loaf.
-
Put a large bowl over the dough and let it rise for another 30-40 minutes.
-
After 15-20 minutes, heat the oven to 450 degrees. Ensure that your head is on a lower shelf. You may need to remove the other shelf while baking bread.
-
Ten minutes before the dough is ready, put the Dutch oven and allow it to heat.
-
After ten minutes, remove the hot bowl carefully from the pre -oven.
-
Take the bowl out of the top of the dough. Carefully lift the dough by seizing the corners of the parchment paper. Gently lift the dough with the paper, to the Dutch oven.
-
The flour is lightly the top of the dough and then use a sharp knife to cut 3 slices at the top of the loaf. The cracks should be about 1/4 inches and will allow steam to escape and bread to expand during bread.
-
Reducing the oven temperature to 400 degrees. Place the cap on the Dutch oven, and cover the bread. Put the bowl in the oven and bake for 28 minutes.
-
After 28 minutes, remove the cap from the Dutch oven and bake the bread, the discovered, for another 5-10 minutes (the total cooking time is 33-38 minutes).
-
Bread is made when light brown and cook through. After removing the bread from the oven, use the slavery immediately to raise the loaf from the bowl and put it on a shelf to cool. Otherwise, the bread will continue to cook and the lower crust will become difficult and difficult to cut.
-
Allow for 5-10 minutes before cutting and devouring.
Thermal calories: 276kcal | Carbohydrates: 60Z | protein: 7Z | fat: 1Z | Saturated fat: 0.1Z | Unsaturated multiple fats: 0.3Z | Uncomfortable fat fats: 0.1Z | Sodium: 974Niche | Potassium: 81Niche | Viber: 2Z | sugar: 8Z | Vitamin A: 0.05Niche | Calcium: 13Niche | iron: 3Niche
Why do we love this craftsman
I think a firm belief that there are not many simple pleasures in life that strongly satisfy a thick slice of homemade bread from the oven. The smell of rich yeast during bread, the crust crisis against the internal interior, the soft pillow … perfection. Thanks to this recipe, it can be completely accessible even more amateur. Can you put things in a bowl and move them? Do you have an oven? If you answer yes to these questions, you can make this bread. I can guarantee that you will be very happy because you did it. It is completely uncomplicated and completely delicious. Let’s bake!

Ingredients you need to make a literal bread of the easy Dutch oven:
- precise
- Instant yeast
- salt
- honey
- water
All ingredients are highly essential, and those I have always ended in hand. I used baking flour, but I also used multi -purpose bread with successful and delicious results. So you are. It is important to use the instant yeast (sometimes the name rises) in this recipe, because this super easy bread does not require you to prove the yeast. You can use any salt you have in a manual- I usually use regular table salt. Ensure that the water is very warm, between 120-130 ° F. It should be a little warmer than the water temperature that you will use in the regular active yeast, since we share other ingredients. It does not have to be very accurate, but it is very cold and will not activate the yeast. Very hot will kill it.

How to make a literal bread for the Dutch oven
I was not joking when I said this bread was easy. Easily emptying and beating.
- Distinction of flour in a large bowl: On one side of the bowl, add the yeast. On the other side of the bowl, add salt (you do not want to touch the two before adding the liquid or will interfere with the yeast).
- Combine wet components: In a separate bowl or a liquid measuring cup, whisk honey and water together. Water should range between 120-130 degrees.
- Mix together: Pour the water/honey mixture into the bowl and give it a good uproar until the dough meets together (I love to use the Danish dough for this). It will look a bit rough and impressive.
- Let it rise: Cover the bowl with a moist kitchen towel and let it rise for two hours.
- After the dough had a chance to rise, put a paper of parchment paper and give it a gentle paint of flour.
- Figure and comfort: Empty the dough on the flour slavery and form gently in a loaf, be sure not to deal with the dough too much. Put the bowl upside down over the dough (use a large glass bowl) and leave it for another 30-40 minutes.
- bread: Heat the oven, add the Dutch oven near the end (use the Dutch oven 6 Quarts if baking one large loaf, or a 3 -quit Dutch oven if made with a smaller loophole). Carefully lift the dough, using a university degree sheet as holding, gently in the Dutch oven. Cover with the cover and bake for 28 minutes. Remove the cap, and continue to bake for another 5-10 minutes or until it becomes light golden.
- amazing: When cooking is done, immediately lift the bread from the bowl to cool. If you leave it in the bowl, it will continue to cook and the crust will become very difficult. Let it cool for 5-10 minutes before serving.
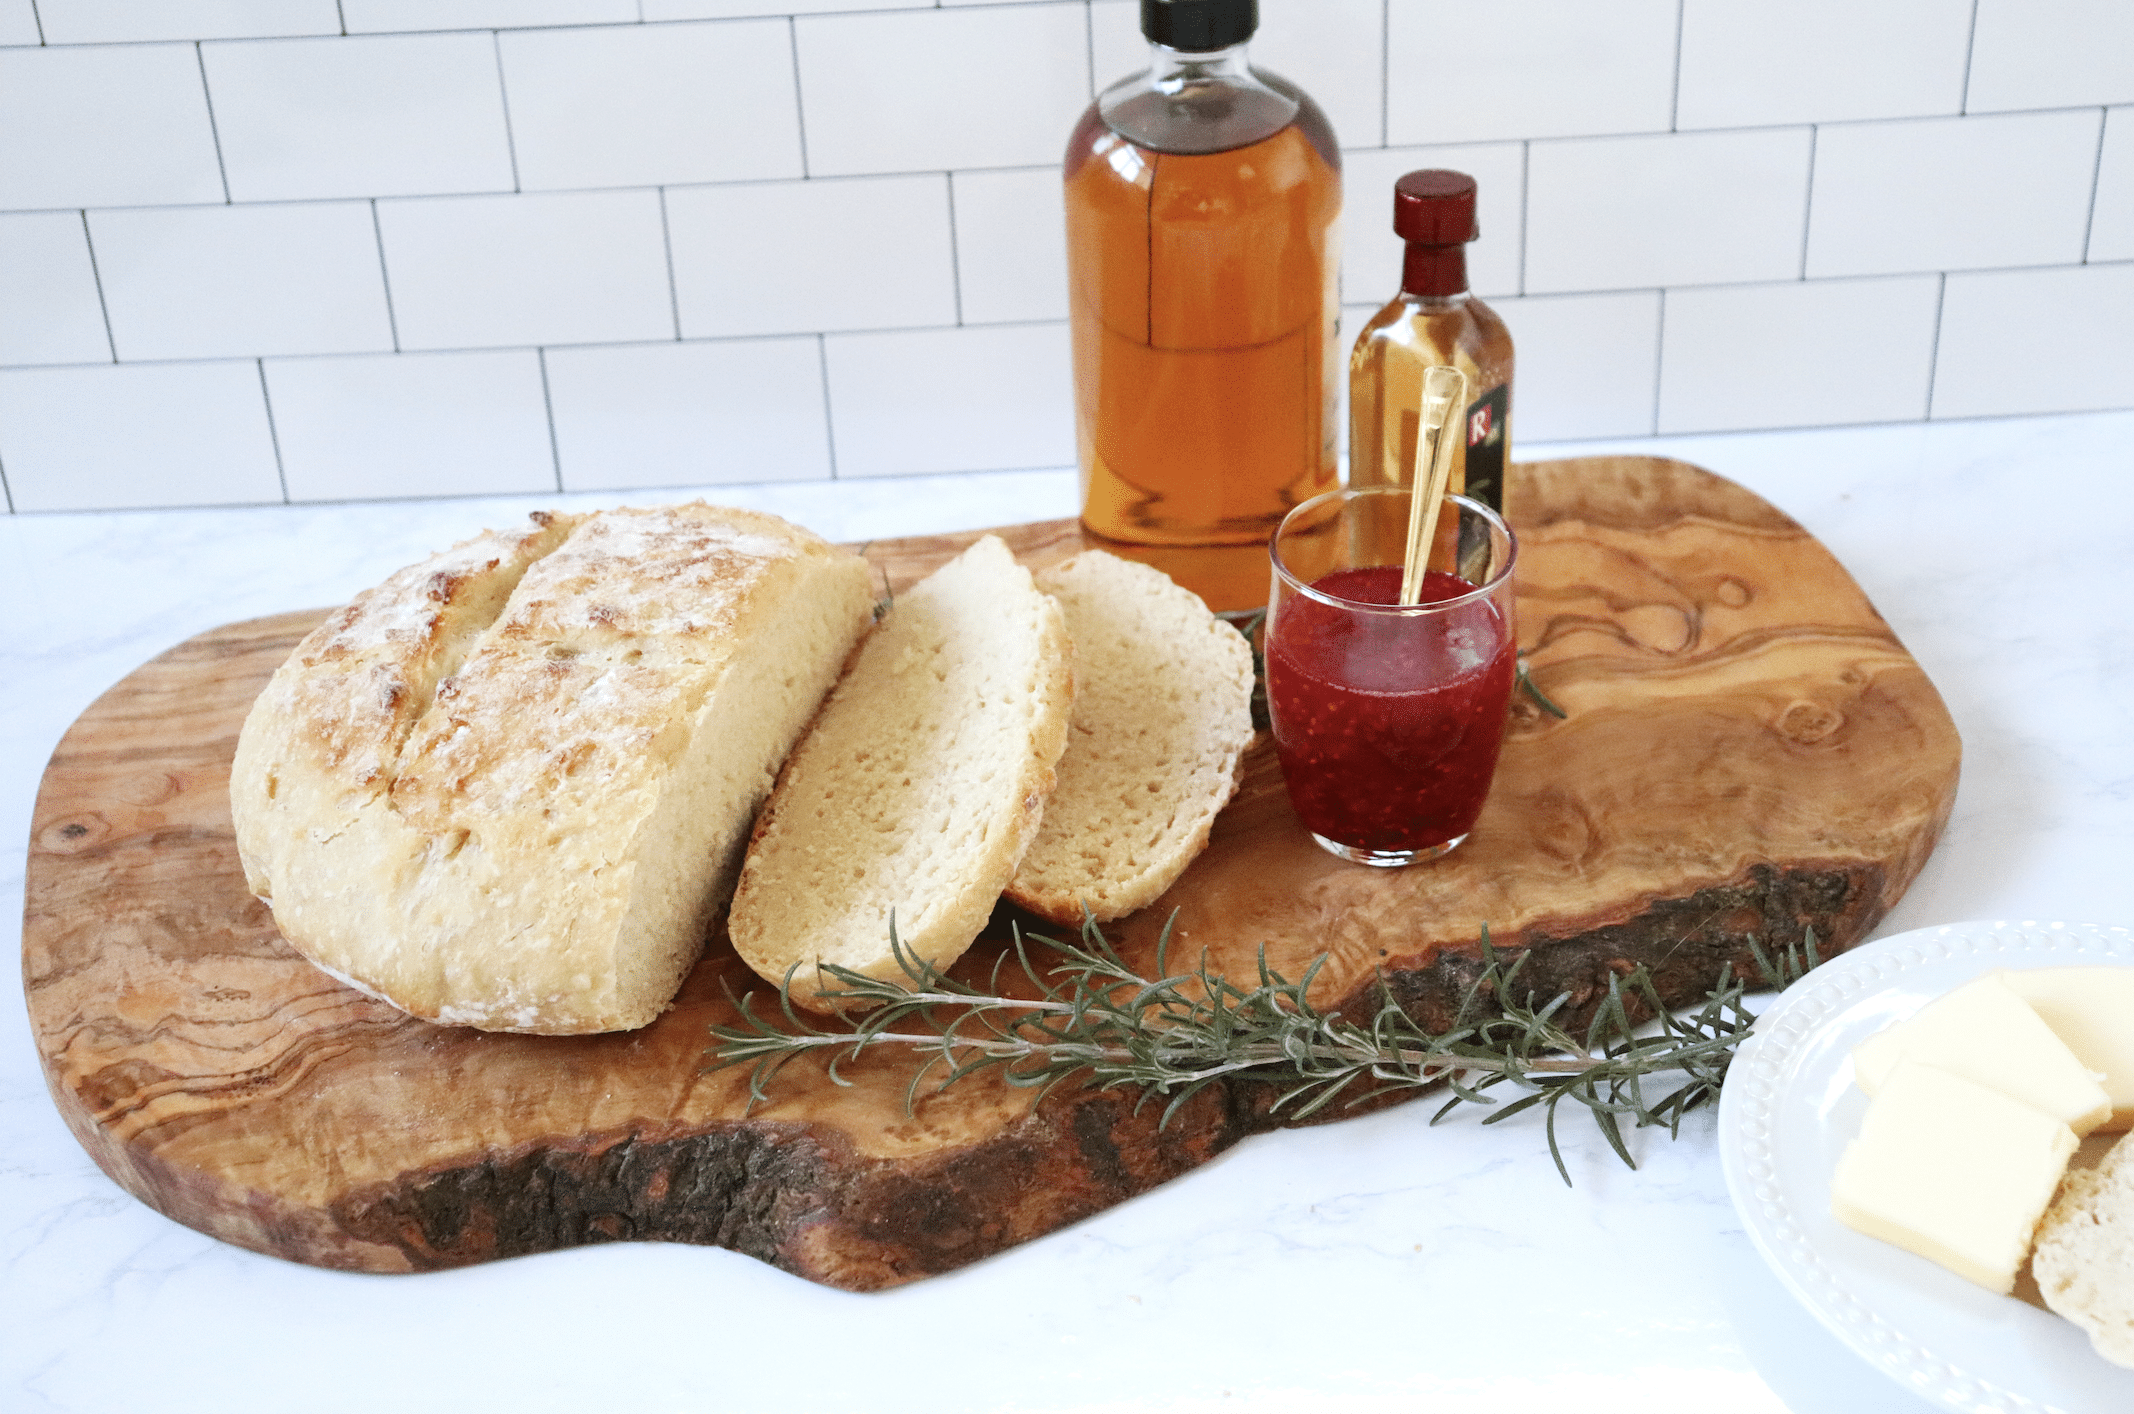
- Enjoy !! We love to eat our glove with bread or decrease in olive oil with a delicious flavor.

More about this amazing Dutch craftsmanship:
Not kneading!
This baking recipe does not require any kneading. Just a sensation and comfort. This is why this is a great dinner per week. It requires a little time, but most of it is his hands.
It is versatile!
Take this bread to the next level by adding flavor reinforcements such as a fresh rosemary, dried herbs, chopped garlic, chopped garlic or acute cheddar.
How to serve:
This bread is really the best when enjoying it on the same day on which bread is done. If you cannot finish everything in one day, you can divide the dough into two halves and make a smaller Argreen. Additional dough can be stored in the refrigerator in a covered container for up to three days.
We enjoy the butter -covered bread, covered with olive oils with a flavor, covered with jam or thick slices of cheese, or mowed in homemade soup. The remaining bread is perfect for roasted bread or grilled cheese sandwiches.